Subtitles are no longer a nice-to-have. YouTube, Netflix, and Instagram are all leaning into automatic captioning because viewers expect it. Captions make videos accessible to viewers who are deaf or hard of hearing, hold attention from the 80%+ of social viewers watching with sound off, and feed search engines extra text to index — which boosts video SEO.
Unless your subtitles are hardcoded into the video frames, you'll need an SRT file to add captions on platforms like YouTube, Facebook, LinkedIn, and X. This guide shows you how to download an SRT file from any video online using VEED's auto subtitle generator — free to start, browser-based, no install needed.
Key takeaways
- An SRT (SubRip Subtitle) file is a plain text file with timestamps and caption text. It works on YouTube, Facebook, LinkedIn, X, Vimeo, VLC, Premiere, Final Cut, and almost every video tool.
- Downloading an SRT from a video takes four steps: upload to VEED, run Auto Subtitle, proofread the captions, and download as .srt.
- YouTube only allows SRT downloads from videos you own or have explicit permission to use. The same legal limit applies to most third-party YouTube subtitle downloaders.
- Most social platforms accept SRT uploads, but TikTok and Instagram Reels need hardcoded captions burned into the video instead.
- If your SRT file is in another format (VTT, ASS, SSA, TXT) you can convert in seconds with VEED's subtitle converter — no re-extraction needed.
.png)
[#TOC1]What’s an SRT file?[#TOC1]
An SRT file (short for SubRip Subtitle) is a plain text file that contains the captions for a video, plus the timestamps that tell the video player when each line should appear and disappear. It's the most universally supported subtitle format on the internet — works in YouTube, Facebook, LinkedIn, X, Vimeo, VLC, Plex, Premiere Pro, Final Cut, DaVinci Resolve, and almost every other video tool.
Inside the file, each subtitle entry has four parts: a sequence number, a start and end timestamp, the caption text, and a blank line separating it from the next entry. Open it in any text editor and it looks like this:
100:00:01,000 --> 00:00:04,000Welcome to the tutorial.200:00:04,500 --> 00:00:08,000Let's get started.
Why SRT became the universal standard:
- It's plain text. Any tool can read or write it without special libraries.
- It's compact. A 2-hour movie's full subtitle file is usually under 100 KB.
- It's editable. Open in Notepad or TextEdit, fix typos directly.
- It's portable. The same file works across video editors, players, and social platforms.
There are other subtitle formats — VTT (web standard), ASS and SSA (advanced styling), TXT (plain transcripts) — but SRT is the safe default for almost any use case. If you're not sure which format to use, pick SRT.

Why SRT files are essential for social video
- Video keeps growing. Short-form and long-form video content keeps rising across every platform, and viewers retain more from a captioned video than an audio-only one.
- Most viewers watch on mute. The majority of social media viewers watch videos without sound — captions are how your message lands at all.
- SRT translates to any language. As a brand or creator, you can translate the file into multiple languages your audience speaks, then upload them as separate tracks for a true multilingual experience.
- Search engines index caption text. YouTube and Google use SRT files to understand what's in a video, which helps you rank for the right queries.
- Accessibility is non-negotiable. SRT captions make your content accessible to viewers who are deaf, hard of hearing, or watching in a sound-off context.
[#TOC2]How to create, edit, and download an SRT file[#TOC2]
Now that you know what an SRT file is and how it can be a game-changer for your social media, let’s see how we can make the process easier.
You don’t need high-end technical skills or a lot of time on your hands to do this. We’ll look at a straightforward way to create, edit and download the SRT file for a video—in one editor. Once you understand the process, you can make it a regular part of your post-production video phase and reap the massive benefits it offers.
Let’s dive right into it!
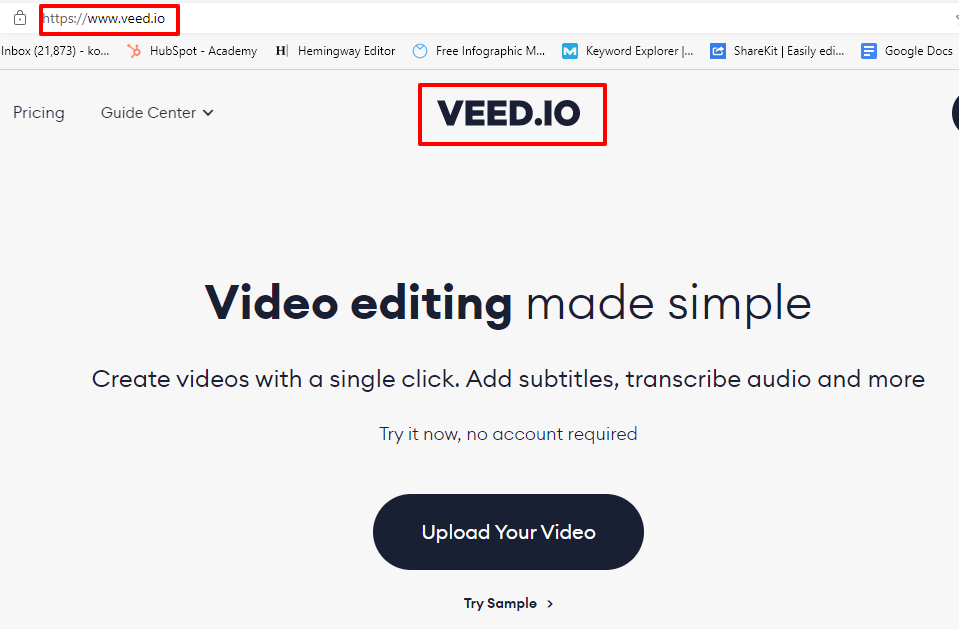
- Go to VEED.IO
You can Google veed.io or simply type our URL in the browser—veeed.premiumtool.shop
This is the online video editor we’ll be using to create the SRT file.
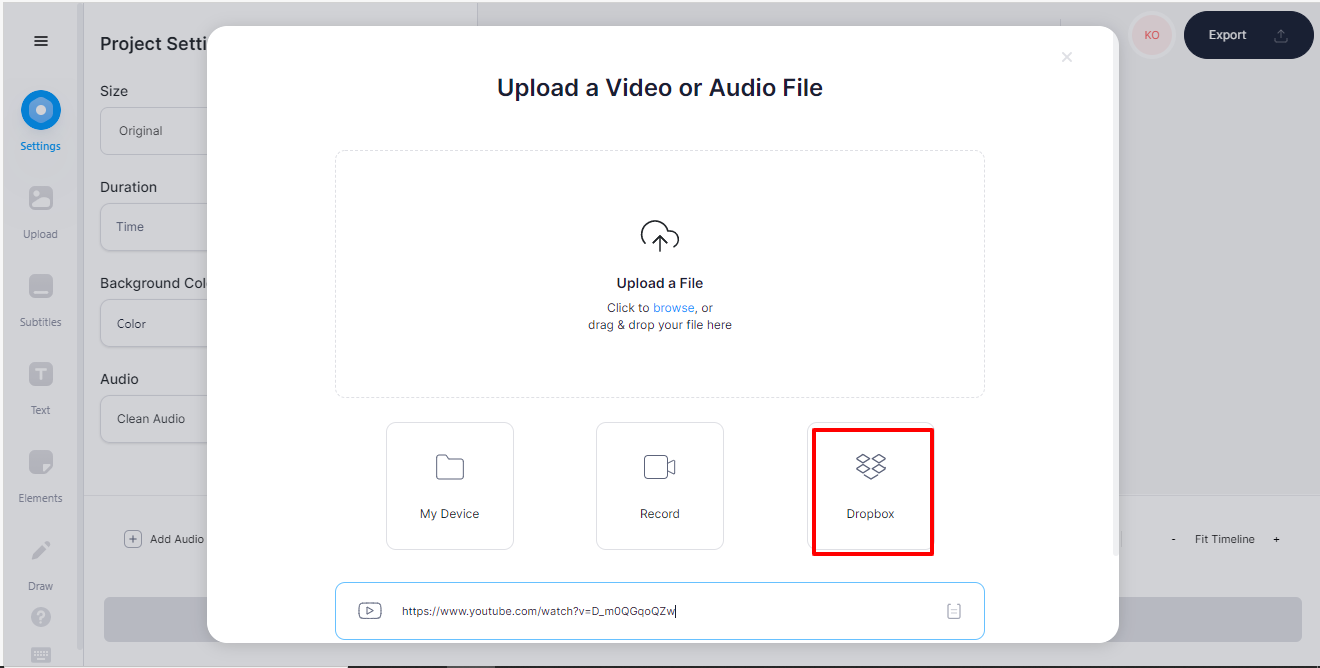
- Upload Your Video
Login to your VEED account and start a new project.
You'll come across a window to upload the video. Here are some ways you can do this:
YouTube video URL
You can directly add subtitles to your published YouTube video by creating an SRT file.
For this, copy the link to the YouTube video you want to create captions for and paste it into the designated space.

Upload the video directly from your desktop
If you want to create an SRT file for a video on your desktop, simply upload or drag-and-drop the video file here.

Via a device such as your phone
Want to quickly create an SRT file for a video on your phone? We got you!
Just open the VEED editor on your mobile browser, and upload the video to begin your editing and SRT magic.

Via DropBox
Have large files saved in your DropBox? Not a problem.
Simply click on the DropBox option in the upload pop-up, connect your account, and select the video for the SRT file.
- Auto-subtitle your video
Once your video is uploaded and displayed on the editor, it’s time to begin the real work.
Click on the “subtitle” button on the left bar.

You’ll come across three options to add subtitles to your video.
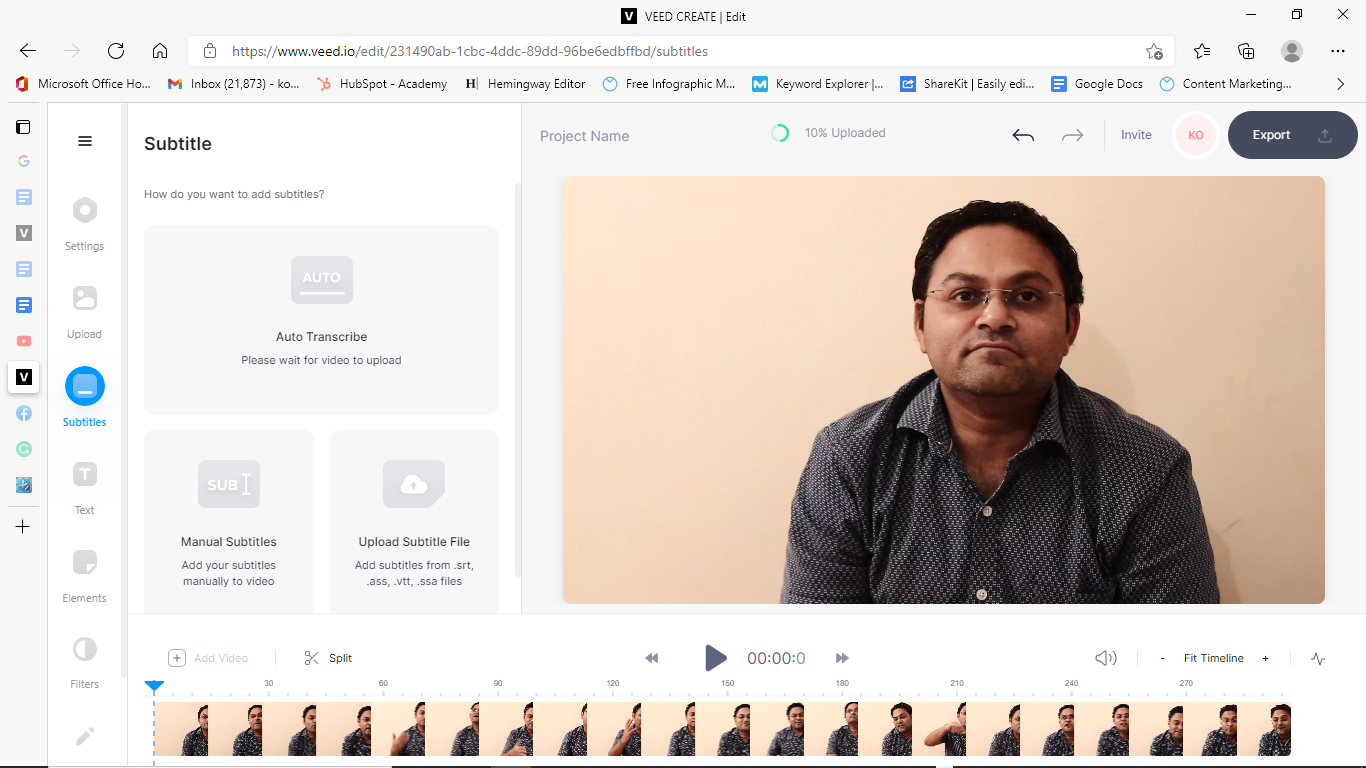
Auto-transcribe
By choosing this option, you can automatically add subtitles to your video with a simple click of a button. The video will get transcribed into subtitles and get added to the file with the correct timestamps. Remember to select the right language for your text.
Manual subtitles
If you prefer adding subtitles manually than transcribing them automatically, you can do that within the editor too. Just click on the "manual subtitle" option, select your language, and start writing the subtitles.

Upload an existing SRT file
If you already have an SRT file or a captioned file in another format for the video, you can choose this option and upload it directly after choosing the language.
Apart from these three methods, you can also export a video with hardcoded subtitles—videos with in-built subtitles but don’t have an option to switch them on or off. You can even add more flavor to these previously subtitled videos and make them more attractive with customizations, but we’ll talk about that later in this article.
- Proofread your subtitles
Proofreading your subtitles is essential, whether you generate them automatically using the tool or hire a person to do it manually. In addition, performing a quality check on the subtitles is a good practice to ensure the grammar, spellings, formatting, transcription, and branding elements are correct.
At this point, you can also check if your subtitles are showing up at the right time during the video—if there are any discrepancies, you can rearrange the text or the timecode for the particular subtitle section.
- Add customizations (optional)
If you added a video with hardcoded subtitles, are someone who likes to play around with video captions, or spend a lot of your time editing content—VEED is more than just a tool to download SRT files.
With this all-in-one tool, you can make your videos on-brand and more interesting than the standard videos on the internet—that too while saving time and money. Here are some exciting customizations you can use in your videos:
Translate subtitles
Do you have an audience that speaks multiple languages?
Well, you can create subtitles for each language in your audience and add them as an option to choose and enjoy while consuming your content.
With the subtitle translation customization, you can translate your SRT file or video from any language to any language—we have a library of over 100 languages to choose from and translate for your videos.

This will help you provide a more inclusive video experience to your audience across different channels.
Add audio and music visualizers
Adding a sound wave your podcast audio or video file into an has never been easier. With the VEED editor, you can add music visualizers and even podcast artwork to videos. This is an excellent feature for podcasters, artists, poets, spoken word artists, and musicians.
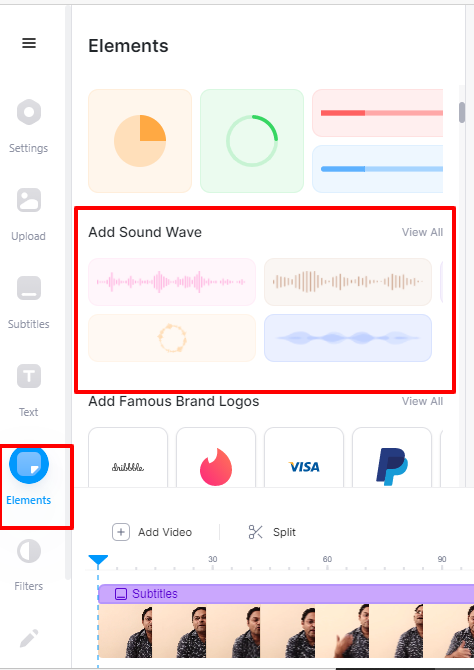
With a few simple clicks and an array of audio and music visualizer customizations—you can make your video file stand out on social media with fantastic visuals that hook the audience.
Screen record videos with our screen and webcam recorder
With our chrome extension and free online screen recorder app, you can use your webcam and audio to create stunning screen recordings and use them in your videos. Simply record your screen with audio, or show yourself using the webcam side by side—there are multiple layouts you can use for your videos.
Say goodbye to the struggle of using one tool to record your screen and another to edit and merge it with your original video—you can do it all in one place with the VEED editor and chrome extension.
Add filters
Make your videos look professionally shot by using our filter presets for videos. There’s a library full of video filters to cater to the different moods of your video, along with coloring and grading options to make it a perfect fit for your needs—all within a single editor.
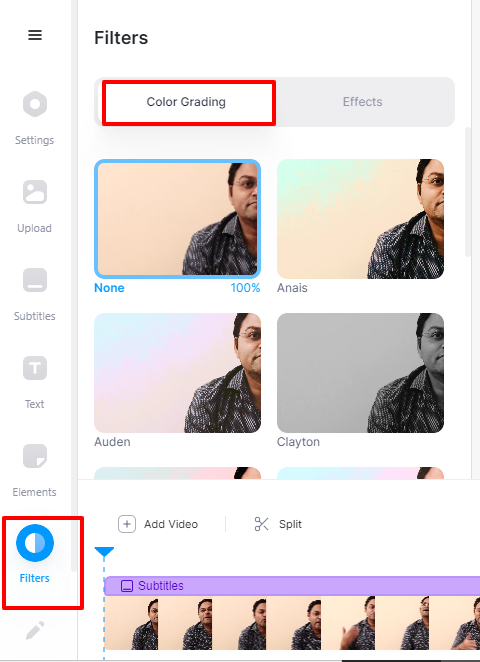
Take your videos from good to great in a few simple steps, and make them social media ready with our filters.
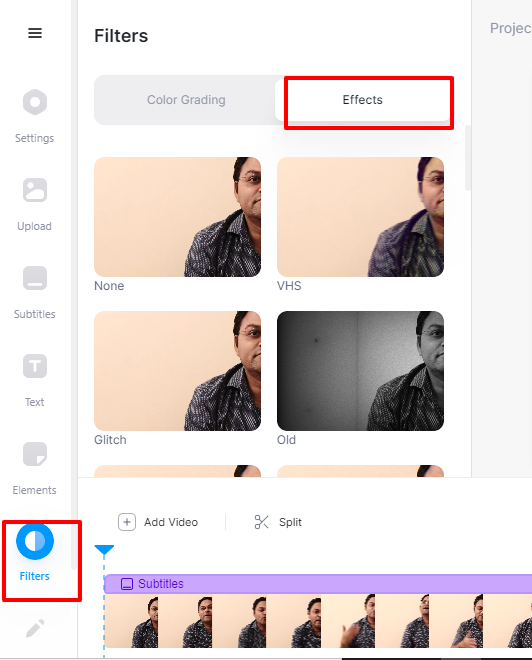
Add video effects
Video effects can make your video stand out on a whole new level. With our effects library, you can pick and use any special effects for your video—and you don’t even need to have any animation or cinematic knowledge for that.
These are a few of the many customizations you can use on the VEED editor to enhance your videos, make them more attractive, and play around with editing—that too while saving time and money on using a more advanced tool.
- Download your SRT file
Two options here, depending on what you need next:
- Download a sidecar SRT file. Click Options at the top of the Subtitles panel → Download Subtitles → pick .srt from the dropdown. This is what you want for YouTube, Facebook, LinkedIn, X, and any platform that accepts subtitle file uploads.
- Hardcode subtitles into the video. Click Export to download a video file with the captions burned into the frames. This is what you need for TikTok and Instagram Reels, since they don't accept SRT uploads.
How to download an SRT file from YouTube
If you want the SRT file from a YouTube video you own, there are two paths. Both work — pick based on whether you want the original auto-generated captions or fresh ones.

Option 1: Download SRT directly from YouTube Studio
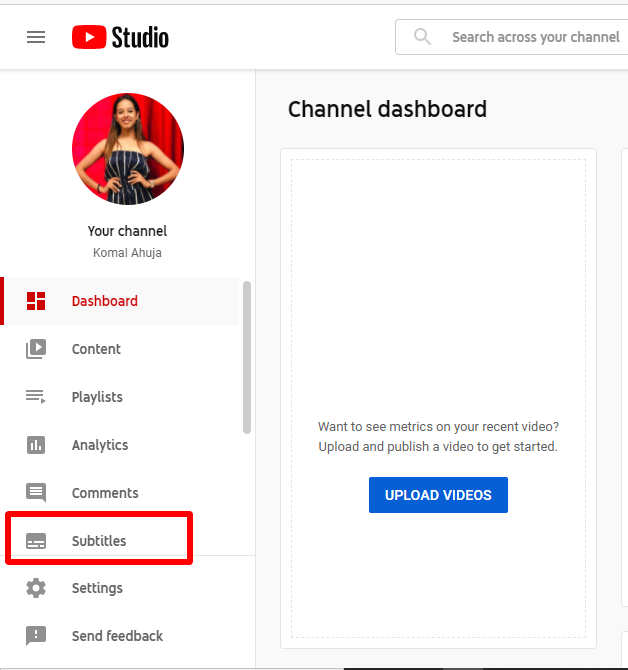
This works for any video uploaded to your YouTube channel:
- Sign in to YouTube Studio
- Click Subtitles in the left sidebar
- Pick the video you want and open the existing subtitle track
- Click the three-dot menu → Download → choose .srt
This is fastest if YouTube's auto-captions are accurate enough for your needs. The downside: no editing or restyling — what you get is what YouTube generated.
Option 2: Re-transcribe with VEED for cleaner captions
If you want better accuracy, dynamic styling, or a translated version:
- Paste the YouTube URL into VEED's auto subtitle generator (videos you own only)
- Click Auto Subtitle and pick the language
- Edit, restyle, or translate as needed
- Open Options → Download Subtitles → .srt
Important legal note: YouTube's terms of service only allow you to transcribe or download subtitles from videos you own or have explicit permission to use. Bulk-downloading SRT files from third-party YouTube videos violates the platform's terms — same goes for any third-party YouTube subtitle downloader.
[#TOC3]How to upload an SRT file to a video[#TOC3]
Now that you have both the video and a downloaded subtitle file—it’s time to upload the SRT file on your preferred social media platform.
Let’s see how you can do this easily:
How to Upload SRT File to YouTube
You can leverage the true power of the SRT file on YouTube because it does not just account for more inclusive content and a good viewer experience but also has SEO benefits attached to it.
When you use subtitles in your YouTube video, Google understands the context of your video content in a much better way. Then, they use these subtitles to pick up keywords, allowing you to rank for them on the search engine. They also pull text and timestamps from your video and file to make you the featured snippet for that particular keyword.

Here’s how you can upload an SRT file to your YouTube video:
- Open YouTube creator studio.
- Click on “subtitles” in the left-hand-side bar.
- Choose the video you want to add subtitles to.
- Click on the “add language” button, choose your preferred language, and confirm.
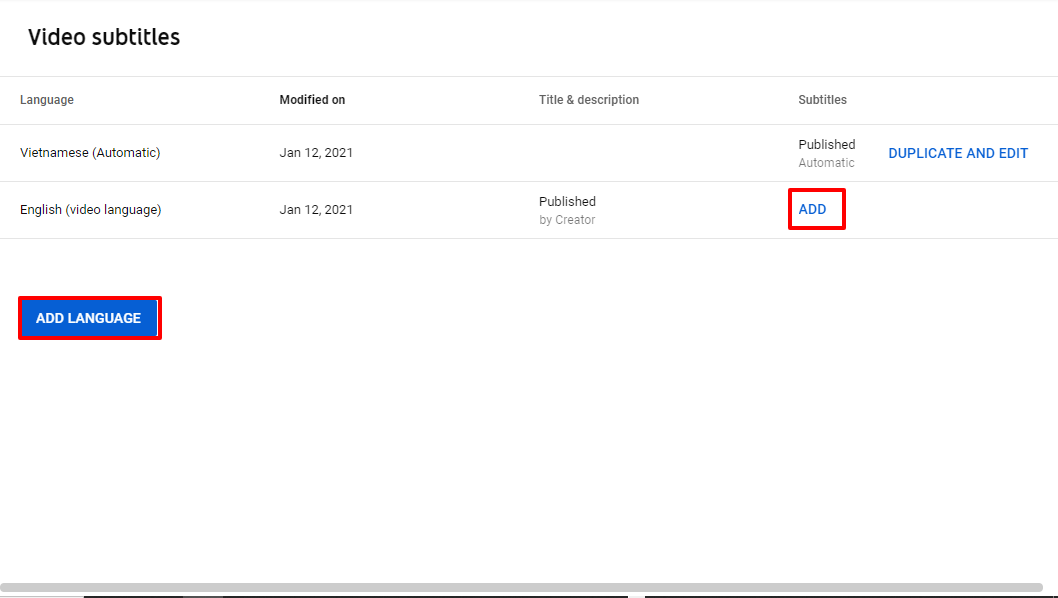
- In the YouTube subtitle editor, choose “upload file.”

- Hit publish, and voila!
How to Upload SRT File to Facebook
There’s a rise in video usage on social media platforms, and Facebook is no exception. Over 85% of Facebook users watch videos with their sound off, which makes adding subtitles to your videos a need more than a choice.
Once you have your SRT file ready, here’s how you can upload it to your video on Facebook:
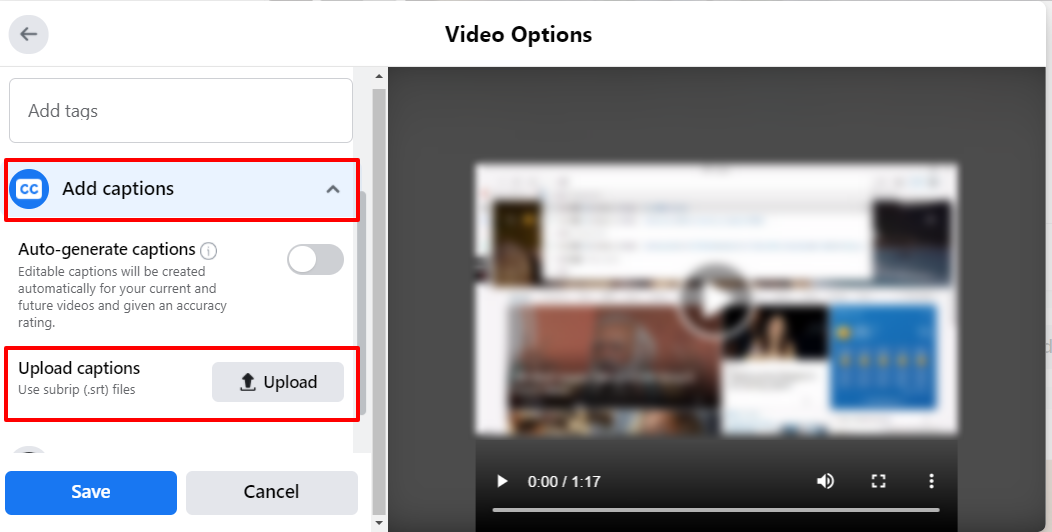
- Open your Facebook profile or page, and choose your video.

- Click on “video options.”
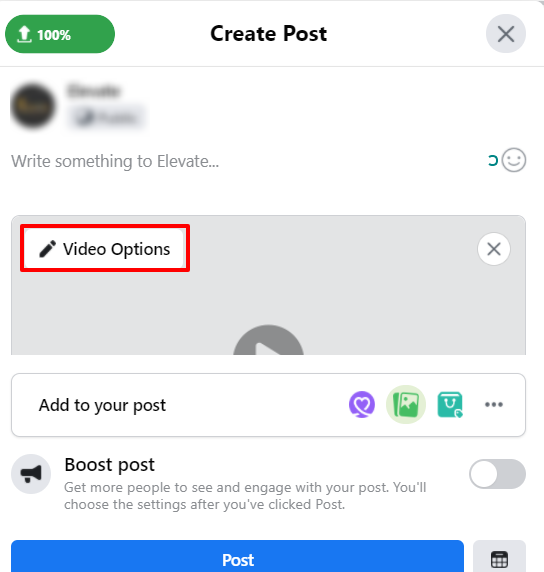
- Under “add captions,” upload your SRT file—you can add multiple files for different languages.
How to Upload SRT File to LinkedIn
As a professional platform, LinkedIn is going big on videos day-by-day. A LinkedIn report suggests that when people are in a professional mindset (like on the platform), they are more receptive to messages, especially in video format.
And videos need to have subtitles so users can watch them without the sound on and enjoy it in multiple languages.
It’s a relatively simple process to add an SRT file to your videos on LinkedIn, here’s how:
- Upload your video
- Select your SRT file and hit “done.”
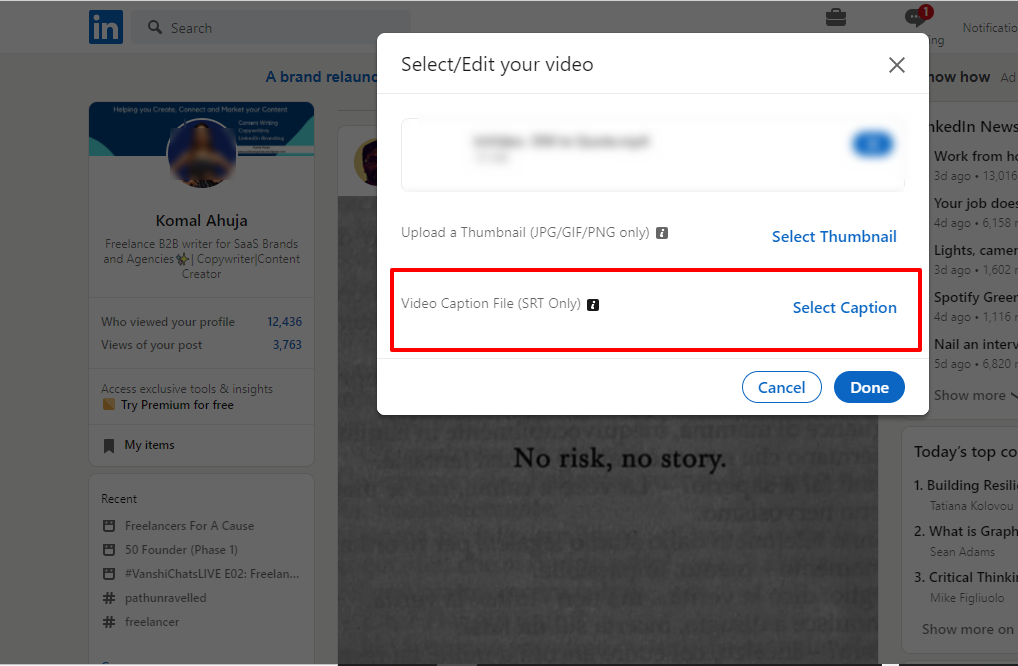
And there you go, you’ve successfully added subtitles to your LinkedIn video.
Common SRT file issues and how to fix them
My SRT file isn't syncing with the video
If every caption is offset by the same amount, the SRT was created for a different version of the video — use a bulk timing offset in VEED to shift all captions forward or back at once. If captions sync at the start but drift further out as the video plays, that's a frame-rate mismatch — the easiest fix is to re-transcribe the audio with VEED's Auto Subtitle.
My platform won't accept the SRT file
Most rejection issues are filename related. Facebook needs the language and country code in the filename (video.en_US.srt). YouTube prefers UTF-8 encoding. If the file opens fine in a text editor but the platform rejects it, re-export it from VEED with the right language tag.
My SRT shows weird characters or symbols
This is almost always a character encoding issue. SRT files should be saved as UTF-8. If you're seeing question marks, boxes, or strange symbols where accented characters or emojis should be, open the file in a text editor and re-save it as UTF-8 encoded.
Download SRT subtitles in your browser
Here's what to remember:
- SRT works almost everywhere. YouTube, Facebook, LinkedIn, X, Vimeo, VLC, Premiere — default to SRT.
- Browser-based wins for most use cases. VEED runs on Mac, Windows, Linux, ChromeOS, and mobile without any install.
- Proofread auto-captions. Names, jargon, homophones, and numbers are the usual error patterns.
- TikTok and Reels need hardcoded captions. Use Export instead of Download Subtitles for those platforms.
Next step: Generate and download your SRT file with VEED — free to start, supports 125+ languages, exports as SRT, VTT, or TXT.